ID Photo Aspect Ratios Explained Simply
Have you ever tried taking an ID photo for your passport, driver’s license, or student card, only to find out it doesn’t meet the required specifications? If yes, you’re not alone. The size and shape of an ID photo — what we call the aspect ratio — is crucial. It can make or break your application! In this article, I’m going to walk you through everything about ID photo aspect ratios — what they are, why they matter, the common standards, and how you can easily get it right. No confusing jargon, just plain, simple info you can use immediately.
What Is Aspect Ratio Anyway?
Aspect ratio is a term used to describe the proportional relationship between the width and height of an image or photo. It essentially tells you how the shape of the picture is formed by comparing how wide it is to how tall it is. Instead of focusing on the exact size, aspect ratio is all about the shape and balance between these two dimensions. This means two photos can be very different in size but share the same aspect ratio if their width and height scale proportionally.
For example, imagine you have a photo that is 4 inches wide and 6 inches tall. To figure out the aspect ratio, you compare these numbers and express them as a ratio — in this case, 4 to 6. This can also be simplified to 2 to 3. What this means is for every 2 units of width, there are 3 units of height. This ratio tells you the photo is more rectangular than square because the height is noticeably longer than the width. Conversely, a ratio like 1:1 means the image is perfectly square.
Understanding aspect ratio helps us quickly visualize the shape of an image without needing to see the exact dimensions. It’s like describing the shape of a window frame — some frames are tall and narrow, others are short and wide. Knowing the aspect ratio is the key to knowing which kind of “frame” your image fits into. It helps in planning how photos fit into documents or screens without being stretched or squished awkwardly.
In practical terms, aspect ratio matters because it ensures images look natural and proportional, especially for official uses like ID photos, passports, or digital displays. When a photo’s aspect ratio matches the required standard, it fits perfectly where it needs to, maintaining clarity and balance. If it doesn’t match, the image might appear distorted or parts of it might be cut off, which is why this simple ratio is so important in photography and design.
Why Does Aspect Ratio Matter for ID Photos?
You might wonder why officials insist on your photo being exactly 35mm by 45mm or 40mm by 50mm. It seems like a minor detail, but the aspect ratio is actually super important for a bunch of reasons. Here’s a detailed list explaining why it matters so much:
- Ensures Uniformity Across All Photos: Agencies require all submitted photos to have the same shape and size so they look consistent on official documents. This uniformity helps maintain a professional appearance and avoids confusion when photos are reviewed.
- Facilitates Accurate Machine Readability: Many IDs and passports are processed using scanning machines that expect photos to be in a specific format. The right aspect ratio helps machines quickly and accurately scan your photo without errors or delays.
- Adheres to Official Government Standards: Governments set strict rules about photo size and shape to reduce fraud and identity manipulation. Correct aspect ratios help keep the identification system secure and trustworthy.
- Prevents Photo Distortion: If your photo doesn’t match the required aspect ratio, it can get stretched or squished to fit the space, making you look unnatural or distorted.
- Avoids Cropping Important Features: Wrong aspect ratios may force the photo to be cropped awkwardly, cutting off essential parts like your chin, forehead, or ears, which are critical for proper identification.
- Guarantees Perfect Fit on Documents: The photo must fit exactly into the designated space on your ID without leaving blank areas or overflowing. This precision is only possible if the aspect ratio matches official specifications.
- Speeds Up Application Processing: Photos that meet the aspect ratio requirements are less likely to be rejected or delayed, helping your application move through faster.
- Improves Visual Clarity: Correct aspect ratios combined with proper photo dimensions help ensure that facial features are clear and easy to recognize.
- Supports Legal and Regulatory Compliance: Using the specified aspect ratio keeps you compliant with laws related to identification documents, which can be important in legal or official situations.
- Prevents Rejections and Retakes: Non-compliant photos are often rejected, meaning you have to retake and resubmit your photo, causing inconvenience and wasted time.
- Enhances Security Features: Properly sized photos work better with embedded security measures on IDs like holograms or digital watermarks, which rely on the photo being correctly proportioned.
- Maintains Consistency for International Travel: For passports especially, the correct aspect ratio ensures your photo will be accepted by immigration officials worldwide.
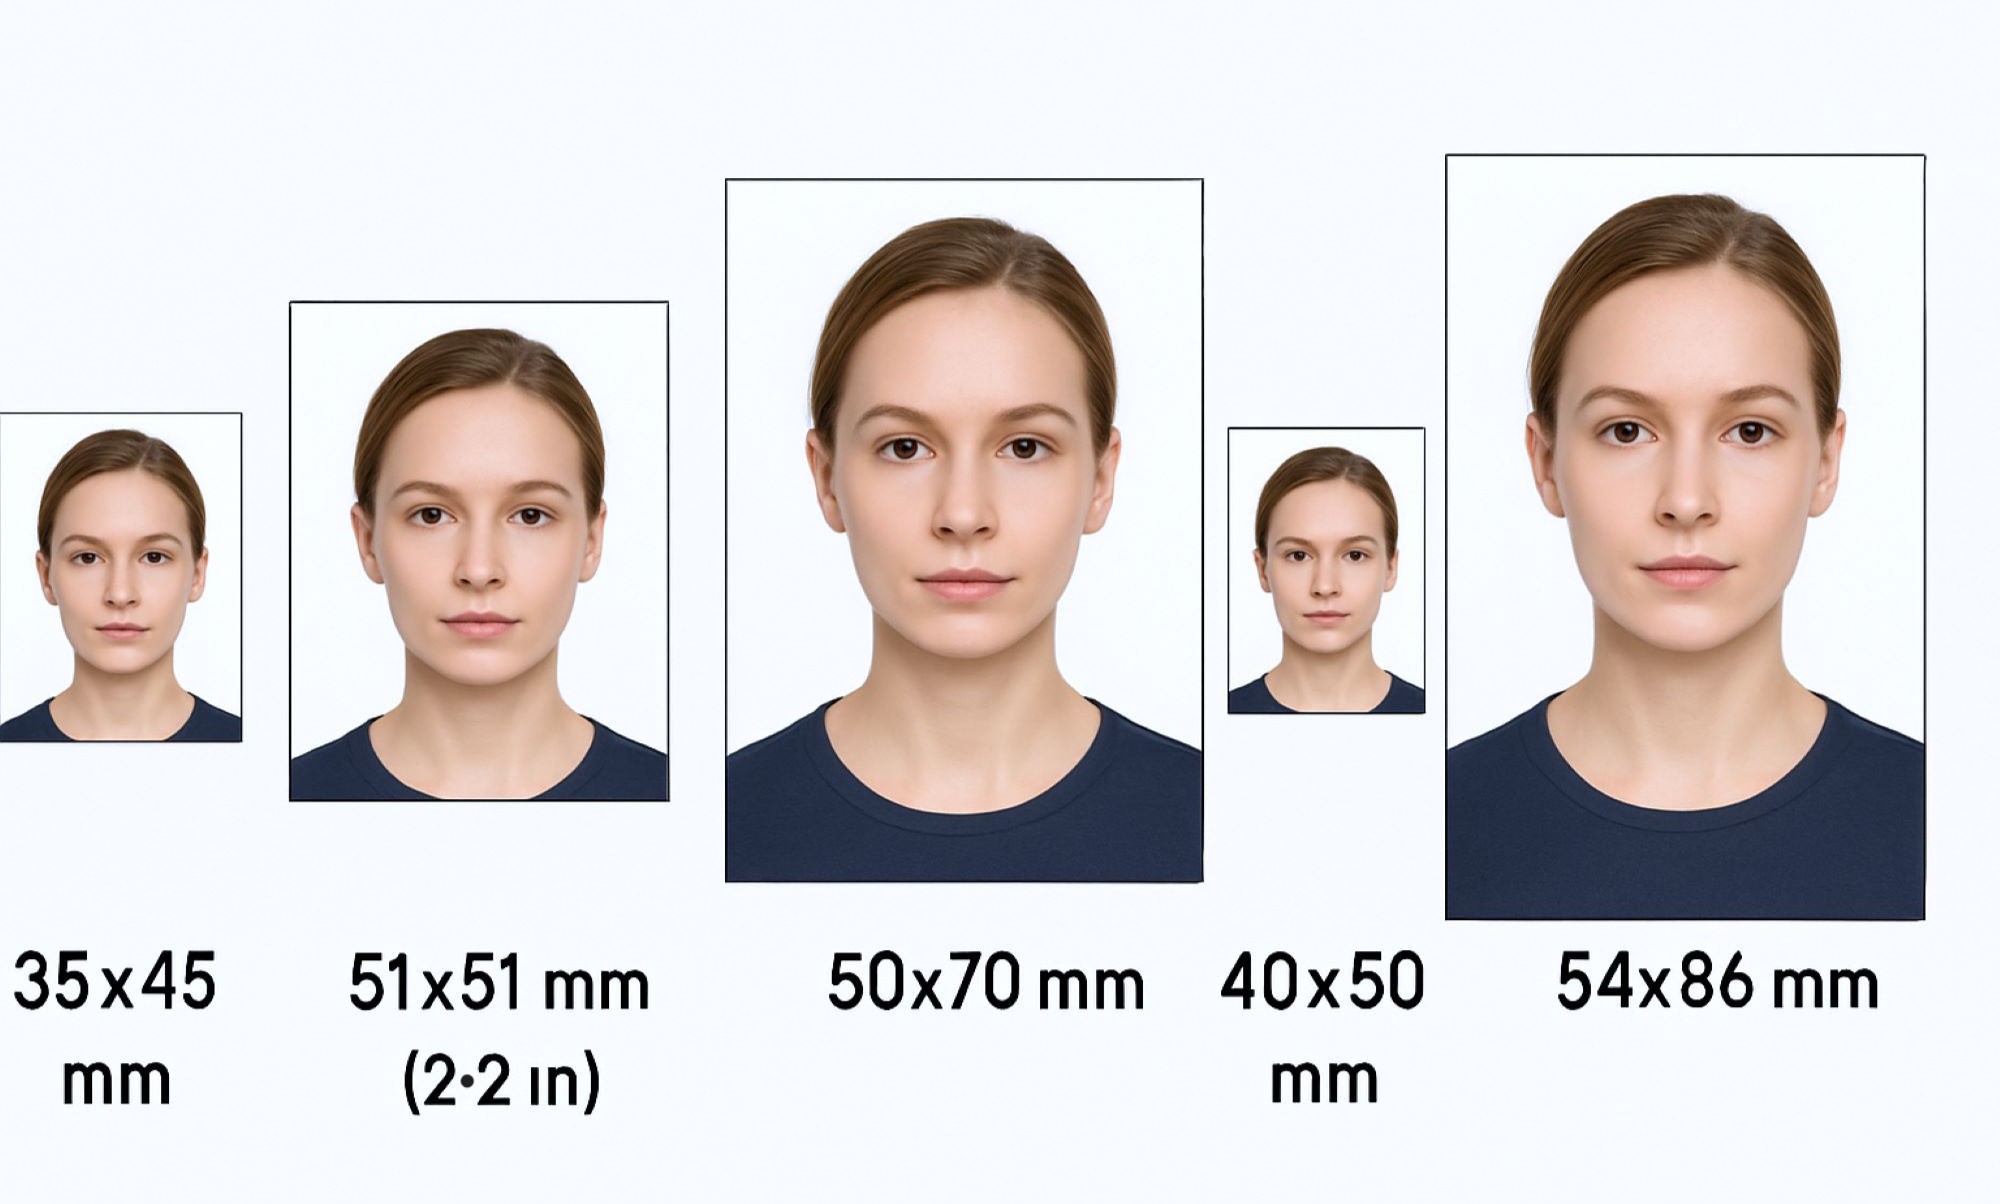
Common ID Photo Sizes and Their Aspect Ratios
| Photo Size (mm/inches) | Aspect Ratio | Typical Usage | Orientation | Notes |
| 35 x 45 mm | 7:9 | Passport photos (Europe, Asia) | Portrait | Standard size for many countries’ passports |
| 2 x 2 inches (51 x 51 mm) | 1:1 | U.S. Passport | Square | Strictly square format required by U.S. Dept. of State |
| 50 x 70 mm | 5:7 | Some visas and identification cards | Portrait | Used in countries like Canada for passports |
| 40 x 50 mm | 4:5 | Driver’s licenses (varies by region) | Portrait | Common for IDs where slightly taller photo is needed |
| 54 x 86 mm | Approximately 2:3 | Some national ID cards | Portrait | Larger format used for certain national IDs |
How to Calculate Aspect Ratio Easily
Calculating the aspect ratio of a photo might sound complicated at first, but it’s actually pretty straightforward once you understand the basic steps. The aspect ratio simply represents the proportional relationship between the width and height of an image, expressed as two numbers separated by a colon (width:height). To figure this out for any photo, you first need to measure the width and height using the same units, such as millimeters or inches. Using consistent units is essential because mixing units will give you an incorrect ratio.
Once you have the measurements, the next step is to simplify the ratio by dividing both the width and height by their greatest common divisor (GCD). The GCD is the largest number that evenly divides both measurements without leaving a remainder. Finding this number reduces the width and height into smaller, more manageable numbers that maintain the same proportional relationship. This simplification helps you easily understand the shape of your photo and compare it with standard aspect ratios.
For example, imagine you have a photo measuring 35 millimeters in width and 45 millimeters in height. To calculate the aspect ratio, first determine the GCD of 35 and 45, which is 5. Dividing both numbers by 5 simplifies the width to 7 and the height to 9. So, the aspect ratio for this photo is expressed as 7:9. This tells you the photo is taller than it is wide, giving you a clear sense of its rectangular shape.
Understanding how to calculate aspect ratios can be very helpful, especially if you want to resize or crop photos correctly without distorting them. It ensures that your image retains the proper proportions, which is particularly important for official documents where specific aspect ratios are required. By mastering this simple calculation, you’ll be better equipped to handle photos in various contexts, from ID pictures to digital displays.
ID Photo Aspect Ratio Standards by Country
- In the United States, the standard size for ID photos, including passports, is 2 x 2 inches (51 x 51 mm). This means the photo is perfectly square with an aspect ratio of 1:1. One important requirement in the U.S. is that the face must occupy between 50% and 70% of the photo’s height to ensure clear visibility and proper framing.
- The European Union uses a different standard where the ID photo size is typically 35 x 45 mm, giving an aspect ratio of 7:9. This rectangular portrait format is common not only for passports but also for various official ID cards across many European countries, maintaining consistency in official documentation.
- In India, the most common photo size for passports and other official identification is also 35 x 45 mm, sharing the same 7:9 aspect ratio as the European Union standard. This size ensures that the photo fits perfectly on official documents while meeting government regulations for clarity and uniformity.
- Canada tends to use a larger photo size for passports, commonly 50 x 70 mm, which corresponds to an aspect ratio of 5:7. While this size can vary depending on the document, it is generally used for passport photos and ensures a clear, well-proportioned image suitable for machine reading and manual verification.
Portrait Orientation Is the Key
| Feature | Description | Importance | Typical Use Case | Exceptions |
| Orientation | Portrait (height greater than width) | Helps frame the face clearly | Most ID photos, passports, licenses | Rarely, some IDs or documents use landscape orientation |
| Facial Visibility | Emphasizes full face capture from chin to forehead | Ensures clear identification | Essential for biometric recognition | N/A |
| Document Compatibility | Fits standard ID layouts designed for vertical photos | Avoids cropping or distortion | Used universally across official documents | Some novelty or specialty IDs may differ |
| Visual Consistency | Maintains uniformity across all official photos | Professional and standardized look | Important for agencies and authorities | Exceptions mostly in digital or specific use cases |
| Machine Readability | Optimized for scanning systems that expect vertical photos | Speeds up processing and accuracy | Passports, driver’s licenses, national IDs | Certain cards or badges may use different formats |
How to Resize Photos Without Losing Quality
If you find yourself with a photo that’s not quite the right size for your ID or official document, there’s no need to worry. Resizing photos correctly is entirely possible with the right approach and tools. The key is to use reliable photo editing software or online applications designed to handle image resizing while preserving quality. Popular programs like Photoshop or free options such as GIMP allow you to adjust your photo’s dimensions precisely without damaging the clarity or detail. Online tools can also be helpful for quick fixes, especially if you don’t have access to professional software.
One of the most important things to remember when resizing photos is to maintain the original aspect ratio. This means scaling the width and height proportionally so the image does not get stretched or squished. If you ignore this, your photo might look distorted and unnatural, which is unacceptable for official documents. Most editing software has an option to “lock” the aspect ratio, ensuring that when you change one dimension, the other adjusts automatically to keep the photo balanced.
Cropping is another essential step in resizing photos. Sometimes, even if the size is right, the framing of the photo might be off, such as the face not being centered or parts of the head or shoulders missing. Carefully crop your photo to focus on the face while keeping the necessary background space intact. This ensures the photo meets official requirements and looks professional. Always keep your face centered and make sure it fills the right proportion of the frame for the best results.
Finally, don’t forget to check the resolution of your resized photo. For printed documents like passports or ID cards, a resolution of at least 300 dots per inch (dpi) is usually recommended to ensure the photo is sharp and clear. Low-resolution images can appear pixelated or blurry, which might cause your application to be rejected. When resizing, make sure the photo retains this high resolution to maintain print quality and meet official standards. Following these steps carefully will help you create a perfect, high-quality ID photo that fits all the necessary specifications.