Retouching ID Photos: What’s Allowed and What’s Not?
Let’s face it — ID photos aren’t exactly your most flattering snapshots. Whether it’s a passport, driver’s license, or any official ID, these photos have to be clear and recognizable. But what if you want to smooth out a zit, adjust the lighting, or fix a stray hair? That’s where retouching comes in. But wait! How much retouching is actually allowed? Can you just Photoshop yourself into looking like a Hollywood star? Or does that cross the line? In this article, we’ll explore what you can and cannot do when retouching ID photos, why rules exist, and how to keep your photo legit while still looking your best. Ready? Let’s dive in!
The Basics of ID Photos
ID photos serve a crucial role in our daily lives as official documents designed to clearly identify an individual. Whether it’s a passport, driver’s license, or any other form of government-issued identification, these photos act as a visual confirmation of who you are. Because of this, the images must provide an accurate and truthful representation of your face, capturing your natural appearance without distortions or misleading alterations. The primary purpose is to ensure that anyone reviewing the ID can instantly recognize you and verify your identity without confusion.
To maintain this clarity and consistency, ID photos must follow strict guidelines regarding their size, background, lighting, and facial expression. These standards are in place worldwide to create uniformity, which simplifies the identification process for officials and biometric systems alike. For example, many countries require a plain, light-colored background, neutral facial expressions, and proper lighting that avoids shadows or glare. These rules help eliminate distractions and focus solely on your face, making it easier to match the photo to the real person.
Moreover, these rigid requirements aren’t just about aesthetics — they play an essential role in preventing fraud and identity theft. If ID photos were allowed to be heavily edited or manipulated, people could potentially alter their appearance to evade detection or create fake identities. This could compromise border security, law enforcement efforts, and many other aspects of public safety. Therefore, governments and agencies enforce these standards to strike a balance between allowing a decent photo and maintaining trustworthiness in identification processes.
With all these factors in mind, it becomes clear why any changes to your ID photo that significantly alter your identity are usually prohibited. The goal isn’t to create a perfect or glamorous portrait but to capture a truthful snapshot that remains consistent over time. So while minor corrections such as adjusting brightness or removing glare might be acceptable, altering facial features, expressions, or other key characteristics that define how you look in everyday life is strictly off-limits. This ensures your ID remains a reliable tool for identification wherever you go.
Common Reasons People Retouch ID Photos
| Reason for Retouching | Description | Allowed? | Examples of Allowed Edits | Examples of Forbidden Edits |
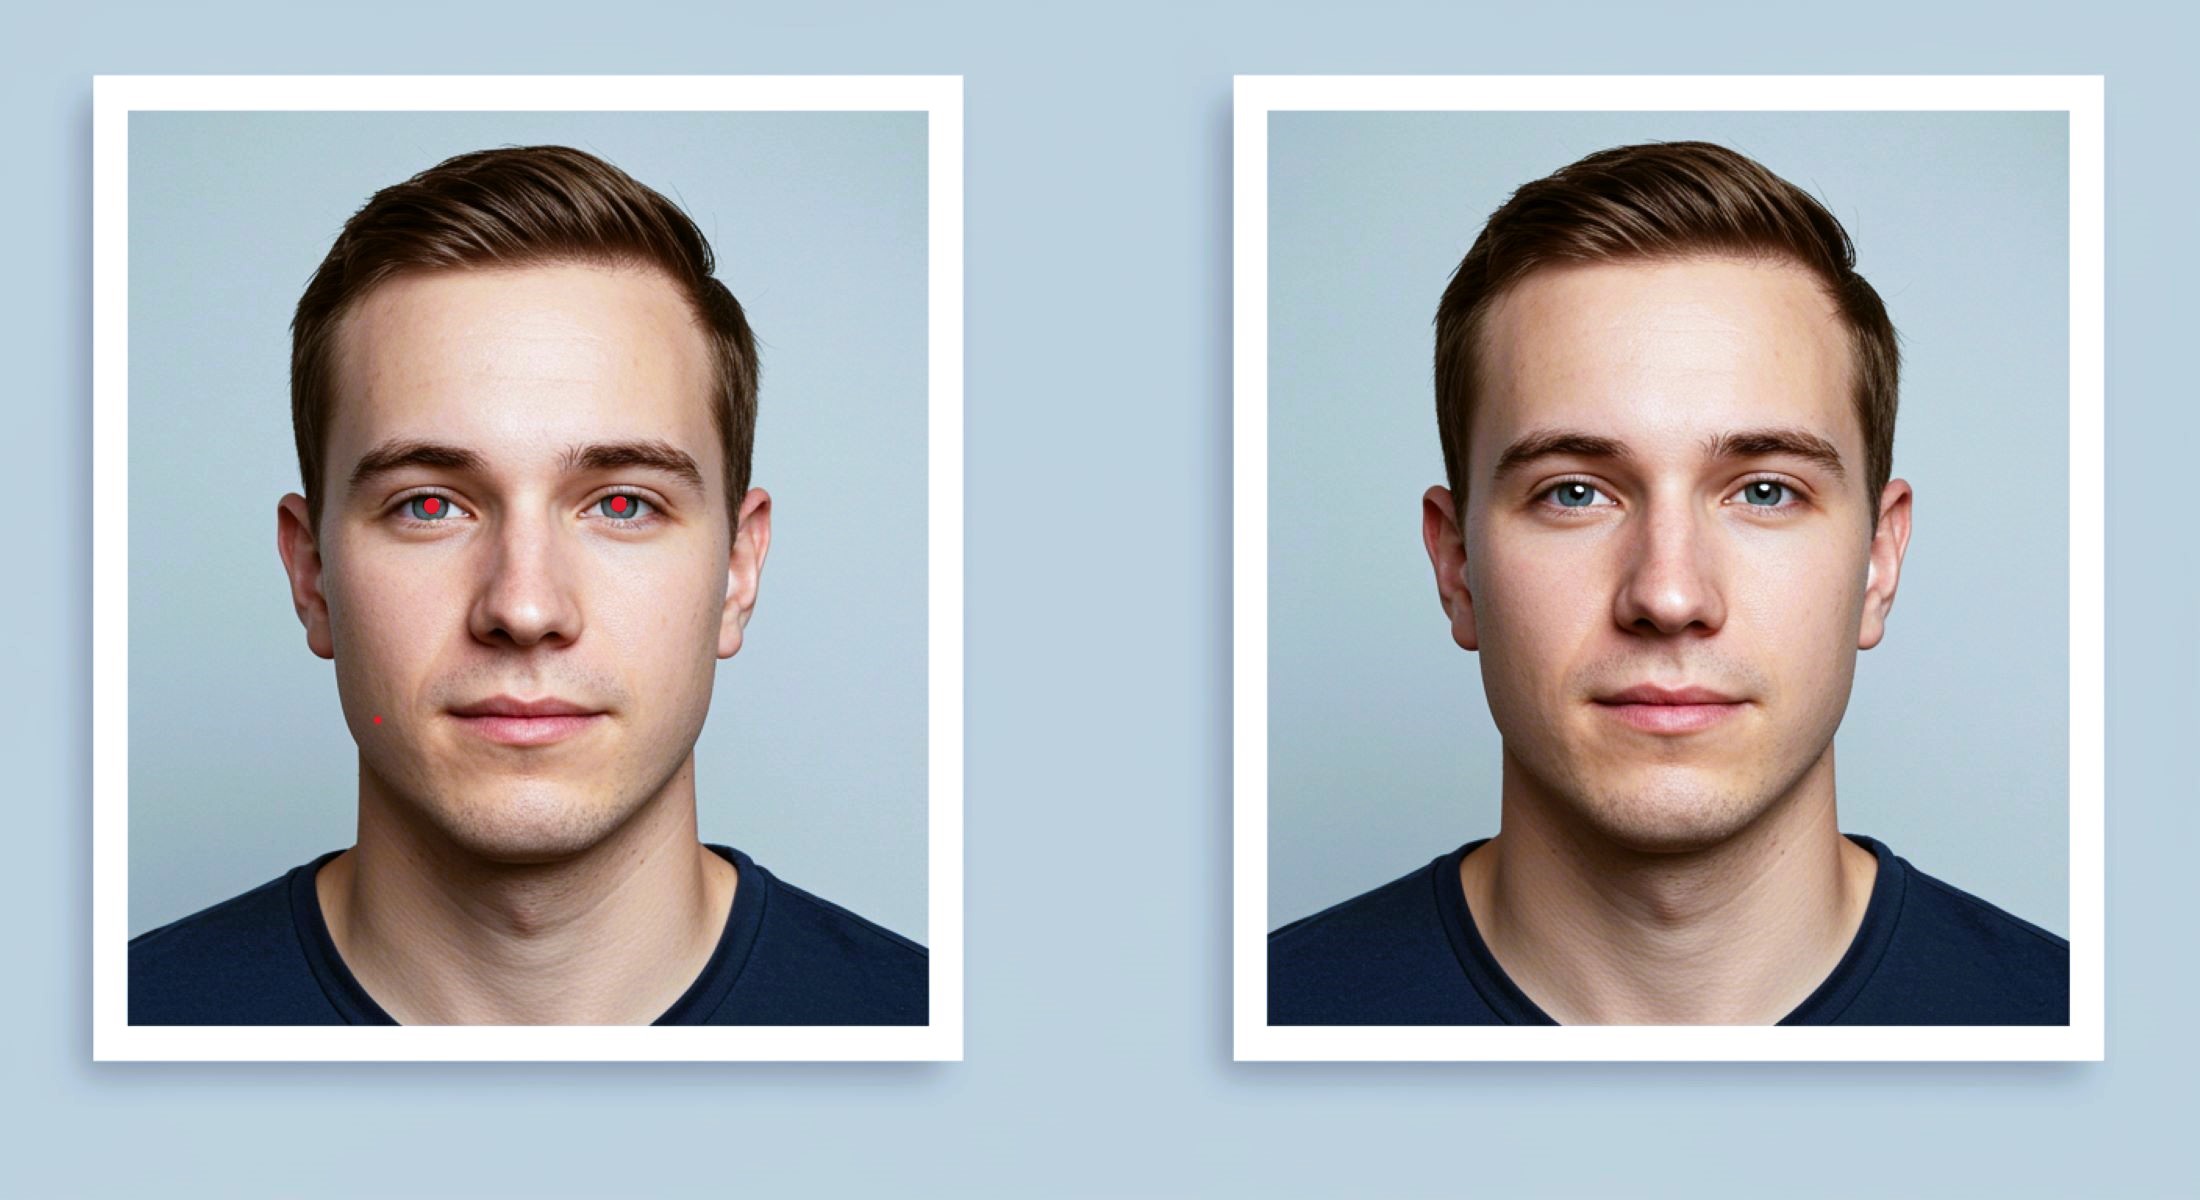
| Red Eye or Shadows Fix | Correcting unnatural red-eye or shadow effects | Yes | Removing red-eye, softening harsh shadows | Changing eye color, reshaping eyes |
| Blemish or Acne Smoothing | Minimizing temporary skin imperfections | Partially | Removing pimples, light smoothing | Erasing scars, birthmarks |
| Brightness and Contrast Adjustments | Enhancing photo clarity and lighting balance | Yes | Brightening face, improving contrast | Overexposure, heavy filters |
| Stray Hair or Glasses Glare Fix | Removing hair or glare that blocks face features | Yes | Tucking stray hairs, removing glare on glasses | Changing hair style or removing glasses |
| Background Correction | Adjusting background color or removing imperfections | Yes | Making background plain and uniform | Adding objects or patterns to background |
What’s Allowed in Retouching?
When it comes to retouching ID photos, knowing what’s allowed can be a bit confusing. But generally, there are clear boundaries you shouldn’t cross to keep your photo legitimate and acceptable. Here’s a detailed list of what you can typically do without risking rejection or violating official guidelines:
- You can brighten or darken the image to make your face clearer, ensuring that all facial features are visible and well-defined.
- Adjusting contrast is allowed to improve the sharpness of the photo, helping the image look crisp and professional.
- Correcting white balance is acceptable so that your skin tone and background colors look natural and free from odd color casts.
- Removing red-eye caused by camera flash is permitted since it doesn’t change your appearance but improves photo clarity.
- Fixing minor lighting issues like softening harsh shadows on your face to make the image look balanced and even.
- Removing temporary blemishes such as pimples, small scratches, or spots is generally allowed to present a clean, natural look.
- Light skin smoothing can be done, but it must be subtle and avoid making your skin look overly airbrushed or artificial.
- You cannot remove or alter permanent facial features like scars, birthmarks, moles, or any distinct marks that are part of your natural appearance.
- Over-smoothing or editing that gives your face a plastic or unrealistic look is not allowed as it changes how you genuinely look.
- Removing glare or reflections on glasses is usually accepted to ensure your eyes are visible and easily recognizable.
- Fixing stray hairs that partially cover your face or eyes is allowed if it helps your face be more clearly seen.
- You cannot digitally change your hairstyle, hair color, or add/remove any hair features as these alter your true appearance.
- Adjusting the background color to a plain, neutral tone that complies with official requirements is permitted.
What’s Not Allowed in Retouching ID Photos?
When it comes to retouching ID photos, certain changes are absolute no-go zones because they alter the fundamental way you look. The most obvious red flag is modifying your facial features. This includes changing the shape of your nose, eyes, lips, or jawline in any way. Slimming or reshaping your face to make it look thinner or different is strictly forbidden. Similarly, enlarging or shrinking any part of your face to achieve a more attractive or “perfect” look is not allowed. The purpose of ID photos is to show your true, unaltered appearance, so any attempt to “beautify” yourself digitally will likely get the photo rejected.
Another critical restriction involves your facial expression. Official guidelines usually require a neutral expression, meaning no smiling, frowning, or making any exaggerated facial movements. You can’t digitally add a smile or change your expression to look happier or more relaxed. The photo must clearly reflect how you typically look, so altering your expression breaks the rules. Along with this, adding or removing accessories like glasses, hats, or jewelry is prohibited. These items might be allowed in person for religious or medical reasons, but you cannot digitally alter their presence in your ID photo.
Eye features also have strict regulations. While removing red-eye caused by flash is permitted since it does not change your natural eye appearance, changing your eye color digitally is a firm no. Altering the shape or size of your eyes to make them look bigger, smaller, or differently shaped is equally forbidden. This ensures that the photo stays a truthful representation of your unique facial characteristics, which is essential for accurate identification.
Overall, the common thread is that any change which modifies your identity or how recognizable you are must be avoided. Retouching is meant to improve image quality, not to create a different person. These restrictions are in place to keep the identification process secure and reliable, making sure that your ID photo matches your actual appearance as closely as possible.
Why Are These Rules So Strict?
| Reason for Strict Rules | Explanation | Potential Risks Without Rules | Examples of Security Threats | Impact of Lax Rules |
| Security and Fraud Prevention | Ensures ID photos accurately reflect true appearance | Fake IDs, identity theft | People altering photos to create false IDs | Increased crime and illegal border crossings |
| Reliable Identity Verification | Supports human and biometric verification systems | Biometric system errors | Facial recognition failures | Delays and false rejections in identity checks |
| Consistency Across Official IDs | Standardizes photo requirements globally | Confusion in verifying identities | Mismatched IDs with holders | Reduced trust in official documents |
| Public Safety and Trust | Maintains integrity of government and institutional processes | Unauthorized access to secure services | Fraudulent access to banking or healthcare | Compromised personal and national security |
How to Retouch Your ID Photo Safely
Retouching your ID photo can help improve its quality without risking rejection — but it’s important to stay within the rules. Here’s a detailed list of practical tips to safely spruce up your ID photo while keeping it compliant with official standards:
- Use official or government-approved photo booths or apps whenever possible, as these tools are designed to automatically follow your country’s photo regulations and reduce the risk of disqualification.
- Limit your edits to basic adjustments such as brightness, contrast, and white balance correction to enhance the photo’s clarity and natural look without changing your appearance.
- Avoid excessive skin smoothing or airbrushing; if you decide to remove blemishes or pimples, do so very subtly and never erase permanent features like scars, moles, or birthmarks.
- Remove red-eye caused by flash, but don’t change eye color, shape, or size as this alters your true identity.
- Fix minor lighting issues like soft shadows or glare on glasses, making sure your eyes and facial features remain clearly visible and unaltered.
- Don’t digitally change your hairstyle, hair color, or add/remove accessories such as glasses, hats, or jewelry — these alterations are not allowed.
- Adjust the background only to meet official requirements: typically, this means a plain, light-colored background without patterns, shadows, or objects.
- Crop or resize your photo carefully to fit size and composition rules, making sure your full head and shoulders are visible without distortion or trimming key features.
- Always review the specific photo guidelines published by your country’s government or issuing authority before editing to ensure compliance with the latest rules.
- If you’re unsure about what edits are allowed, consider consulting a professional photographer or using specialized passport photo services that understand these regulations.
- Save an original copy of your unedited photo in case you need to resubmit or make different adjustments later.
- Avoid using heavy filters or creative edits designed for social media — ID photos require a natural, neutral, and honest representation of your face.
- Make sure your expression is neutral and consistent with official standards; don’t attempt to digitally alter facial expressions.
- When using smartphone apps for retouching, select those that explicitly state compliance with official ID photo standards.
- Double-check the final edited photo on multiple devices to ensure colors, lighting, and details look natural and clear.
Tools and Software That Help You Stay Compliant
When it comes to retouching ID photos, using the right tools can make all the difference between a quick approval and a frustrating rejection. Fortunately, there are several software options designed to help you enhance your photo while staying within the strict guidelines set by authorities. These tools often come with built-in features that automatically correct common issues like background color, lighting, and sizing, making it easier to produce a compliant photo without the risk of over-editing.
One popular option is Passport Photo Online, which provides automatic background correction and minor lighting adjustments. It’s particularly useful for people who want to quickly create a photo that meets official standards without diving into complex editing processes. This tool simplifies the process, guiding users through the steps and ensuring the final image adheres to size and background requirements, making it a favorite among casual users and first-timers.
For those needing slightly more control, IDPhotoStudio offers a straightforward interface to adjust essential elements like size, brightness, and contrast. While it doesn’t have advanced editing capabilities, it’s perfect for basic edits that improve photo clarity without risking non-compliance. Its simplicity makes it accessible for anyone unfamiliar with photo editing software but still wanting to produce a clean and acceptable ID photo.
On the more advanced side, professional tools like Adobe Lightroom offer powerful editing features but should be used cautiously. These programs allow expert users to fine-tune every detail of a photo, including color balance, exposure, and sharpness. However, because they provide such extensive control, there’s a higher risk of unintentionally altering facial features or other aspects that could disqualify the photo. For casual users, many smartphone apps now include “passport photo mode” features that balance ease of use with compliance, offering a convenient way to take and lightly edit ID photos on the go. Overall, selecting the right tool depends on your comfort level with editing and the specific requirements of your ID photo.